Saturday, 21 May 2011

The tops are on and heres the proof

The post office
the starting point
one foot in the door
up and round the bend
when will i grow up
thats the back done
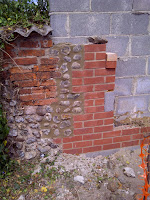
It’s been a week of back and forth with the rain and sun beating down. The final piece of flint was laid and the tops went on. The clients are over the moon and so are we as it’s onto the next job and invoice time. With so many comments on nice the wall looks we are proud to put our name on it, even local builders pulled up to comment directly and indirectly to the owners of the Post office. Which incidentally used to be a forge and has been sold to a film crew? The tops were the choice of the client as were the pillar caps, this did bring about remarks from a neighbour but it’s not his wall. All in all a great job to do considering that the flint was more irregular than my starting times (joking) and it has lead onto another wall of a similar construction approx. 18m long. So there’s another story in the telling.
the neighbours
We did have a couple of days lost due to the weather and another because i had spent all day going round the bend and in the last couple of hours caught the wall with the wheel barrow and knocked a piece of flint out which proceeded to cause the rest to slump. This was solely heart breaking as i tapped it back into place to watch more pieces move out of shape and proceed to fall onto the floor. Slump was not the word used, the thing with flint is you can only lay so much at a time due to it not being porous and allowing the mortar to dry at a reasonable rate. Bricks suck the water out and the mortar goes off (dries) and then you can point them up (joint them). Flint however sits there being held in place by selective positioning and the suction of the mortar until it dries. Using lime also does not help as the lime enables the mix to stay live (usable) for longer? The benefit of using lime as this was the material used in the good old days and when mixed as a 5:1:1 mix it creates the strength and looks required trying and recreating an old looking wall.
round the bend in the inside
toothed out
all fillings completed
the easy part of going round the bend
the front teeth
the bend before the collapse
coming along nicely


visit to the dentists


dentures fitted

final bend


Braces still in place

stand back to look at the front

No comments:

Post a Comment